LGI Rig Section & Reporting
1 After successful login to LGI portal, the user will be redirected to Admin Dashboard. In order to view reports and rig dashboard, the user must select "Client Name", "Rig/Site Name" in sequence and then press "View" button.

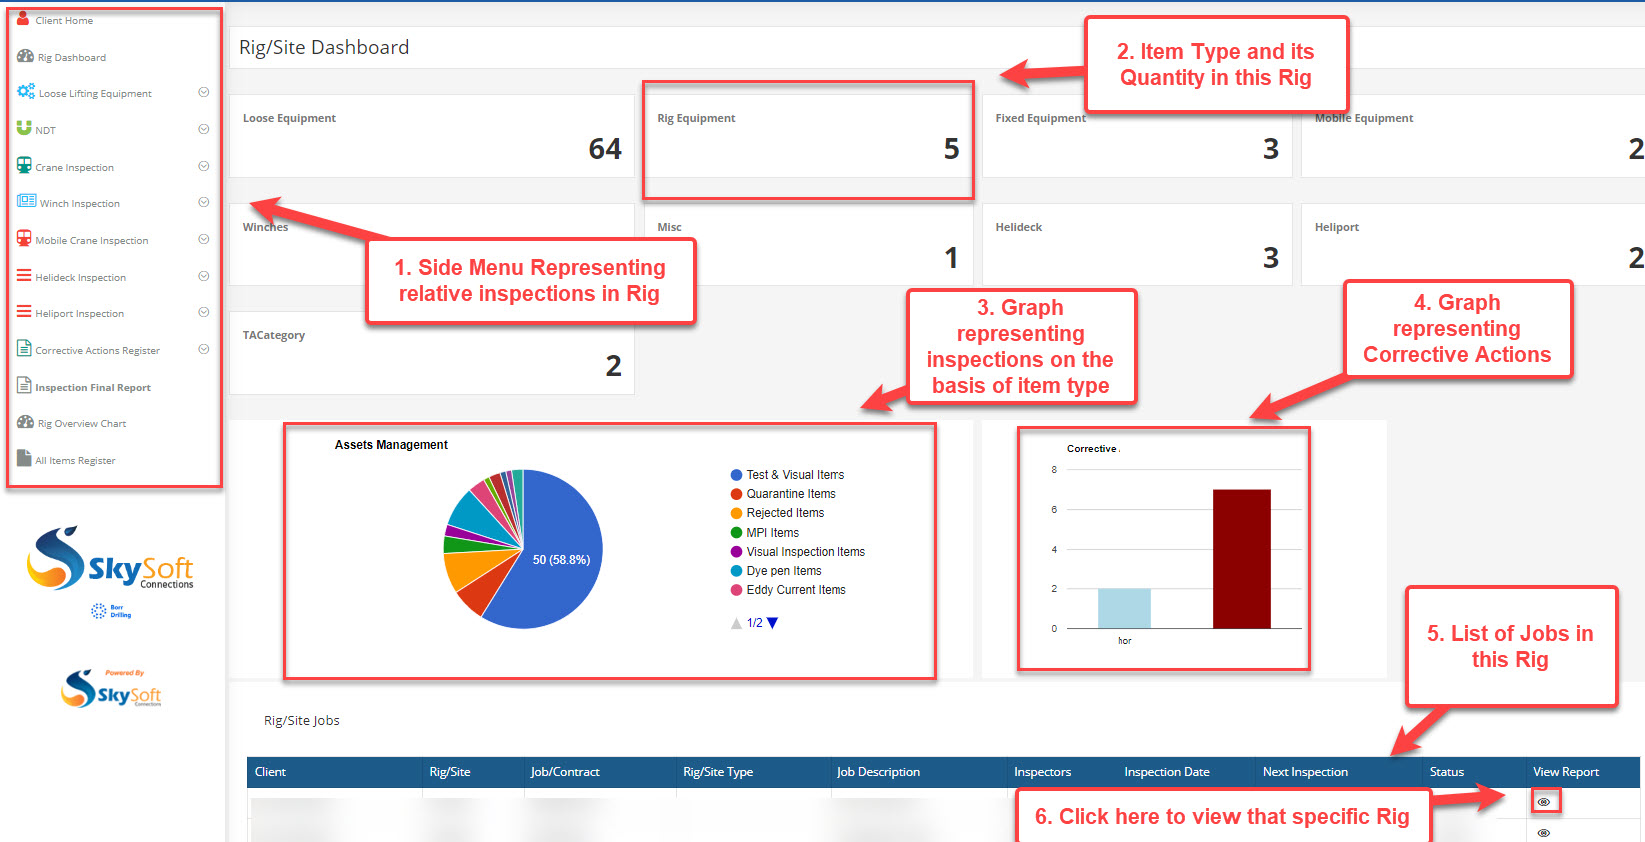
2 Now, the user is redirected to Rig/Site Dashboard. The Rig/Site Dashboard has the following breakdown:
- Side Menu
- Sections representing no. of items by item type in this rig
- Graph representing Inspection on the basis of item type
- Graph representing corrective actions
- List of jobs in this rig
- How to view that specific rig mentioned in the list
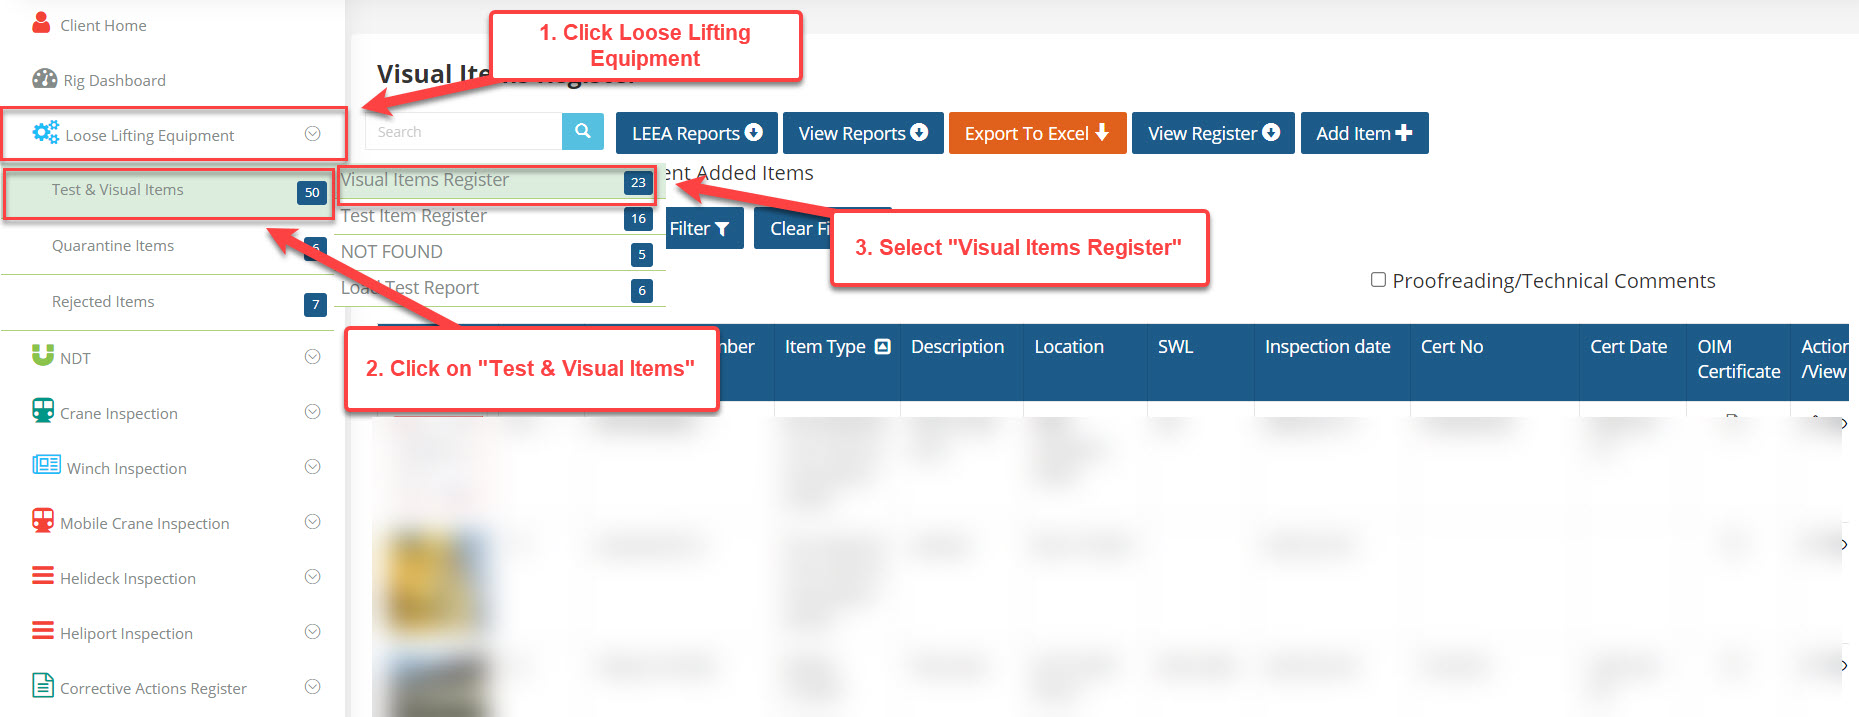
3 If a user wants to view reports and inspection detail of a specific item type, the user can follow these steps:
- Click on Inspection Category e.g "Loose Lifting Equipment"
- Click on Item Type e.g "Test & Visual Items"
- Select Items Register option e.g "Visual Items Register"
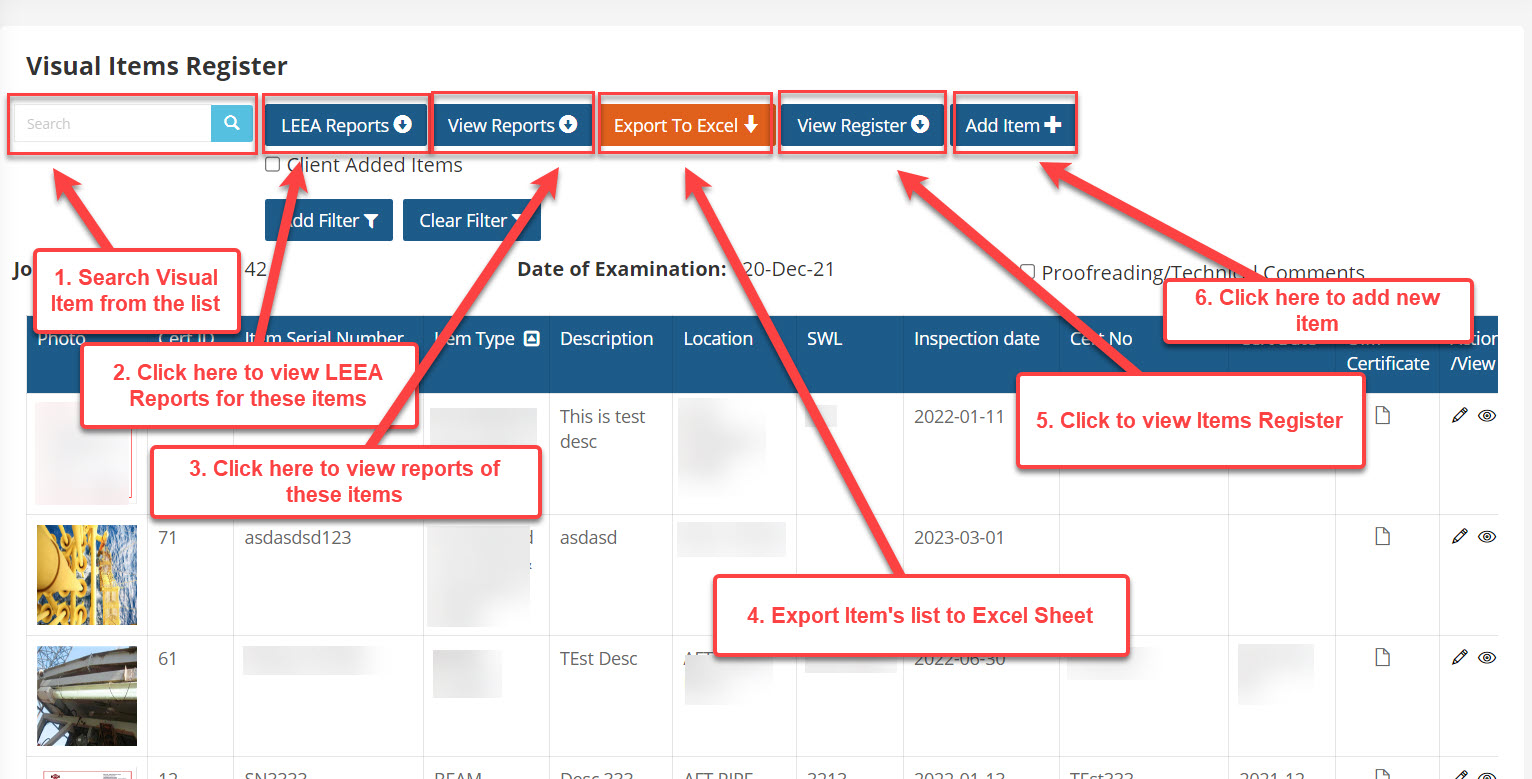
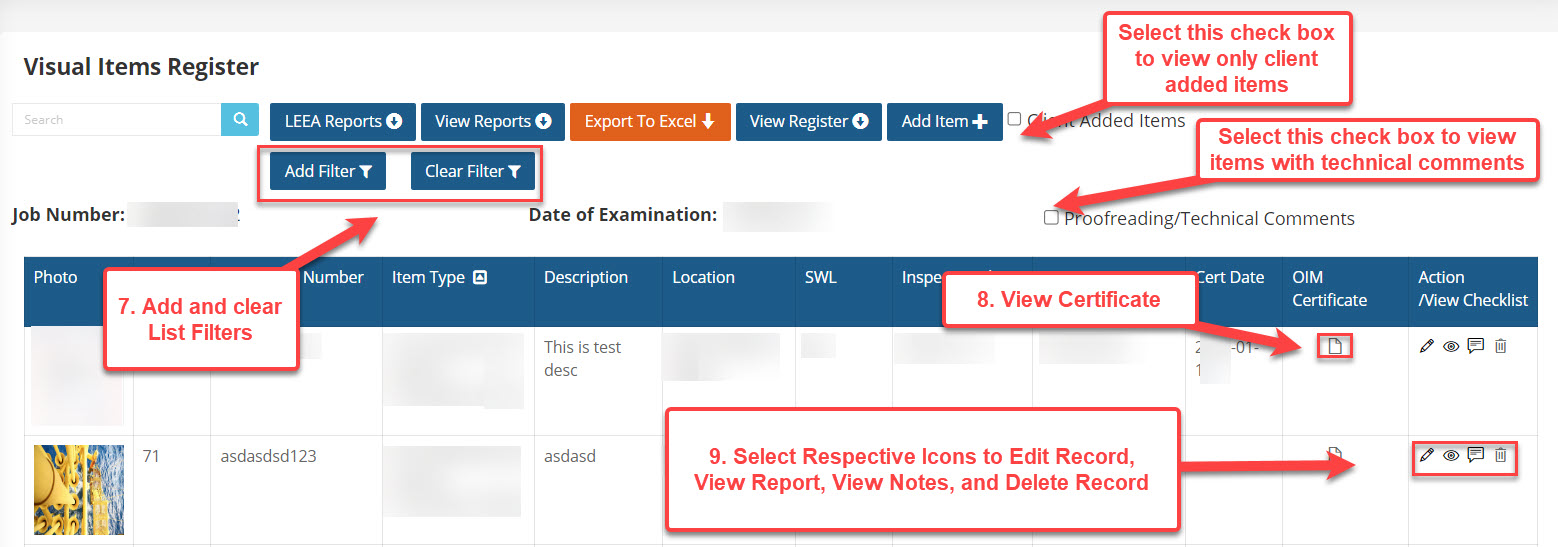
4 After selection, the user can view the list of items in that specific type and inspection category e.g "Visual Items Register" page is displayed in attached picture. This list has following breakdown:
- Search bar to search items from the list
- "LEEA Reports" button to view LEEA Report
- "View Reports" button to view all items report
- "Export to Excel" button to export all items to Excel file
- "View Register" button to view all items register
- "Add Item" to add new item
5 Here is the further breakdown of the previous page:
- 7. "Add Filter" and "Clear Filter" buttons to apply or clear filters on the list
- 8. Click icon to view certificate
- 9. Click respective icon to "Edit Record", "View Report", "View Note", and "Delete Record"
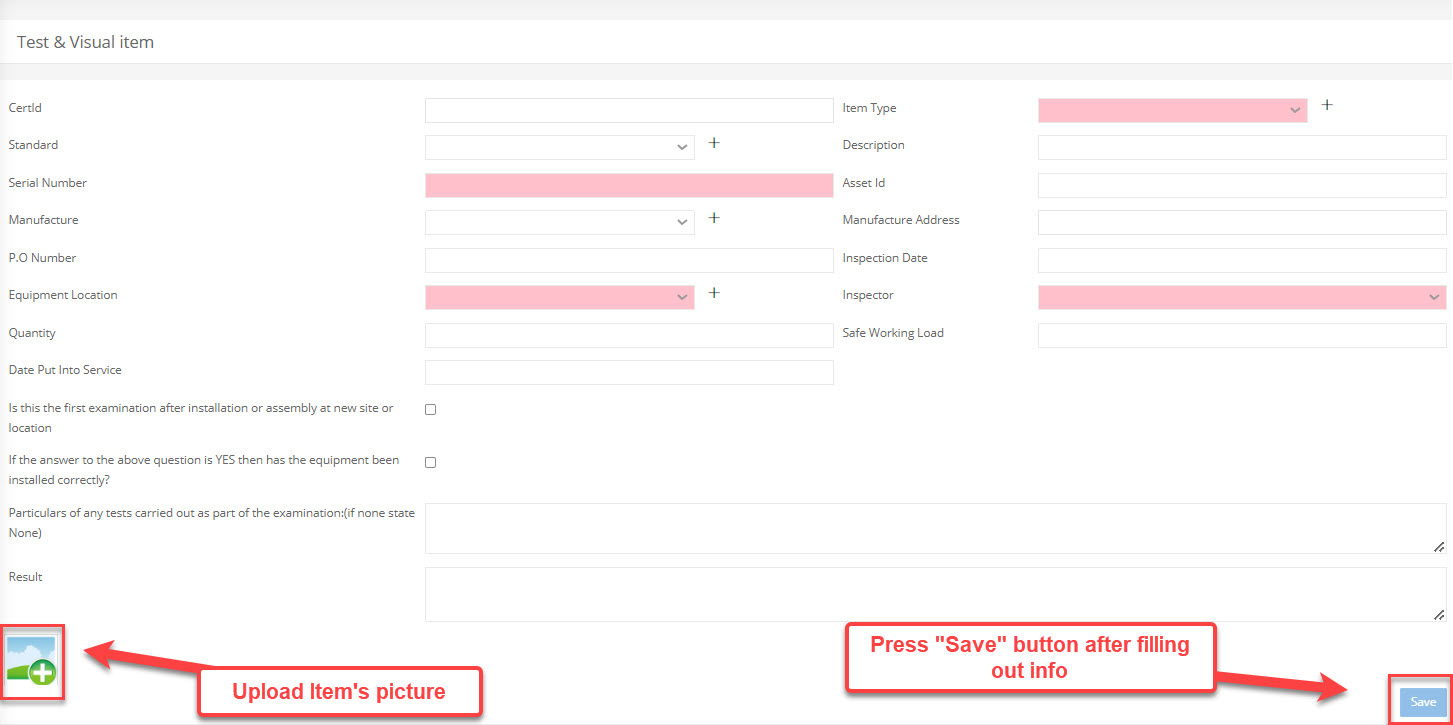
6 New Item: While adding new item by clicking "Add Item" button, the user will be redirected to add item form. Fill in all the required information, upload item's picture and press "Save" button.
7 Filters: When the user clicks "Add Filter" button, filter popup will be opened. The user can add multiple filters by selecting field to filter, operators (like 'contains', 'equal', ....), filter value. The selected filter can be deleted using "Delete" icon. After adding one or more filter, press "Apply Filter" to filter the list.

8 Certificates: When the user clicks on "Certificate" icon, a certificates popup will be opened, where user can add and view certificates.

9 Notes: When the user clicks on "View Notes" icon, a notes popup will be opened, where user can add, view, and delete notes.

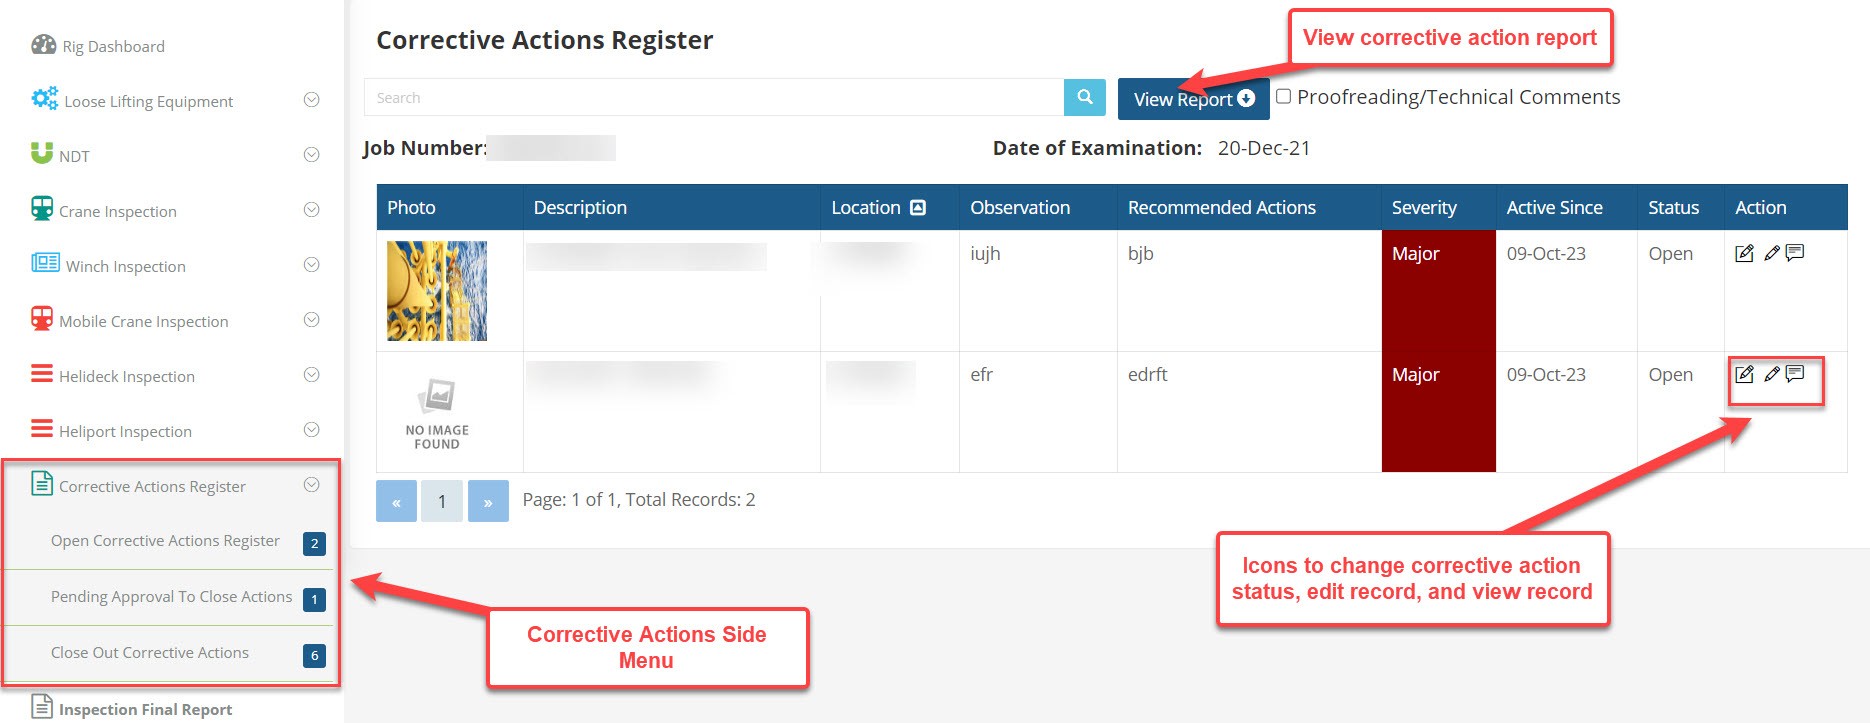
10 Corrective Actions: The user can view, edit, and delete corrective actions by using "Corrective Actions Register" submenu in the side menu, as mentioned in attached picture. The Report for respective corrective actions in the list can be viewed by clicking "View Report" button. The user can change corrective action status, edit record, and delete record using respective icons.
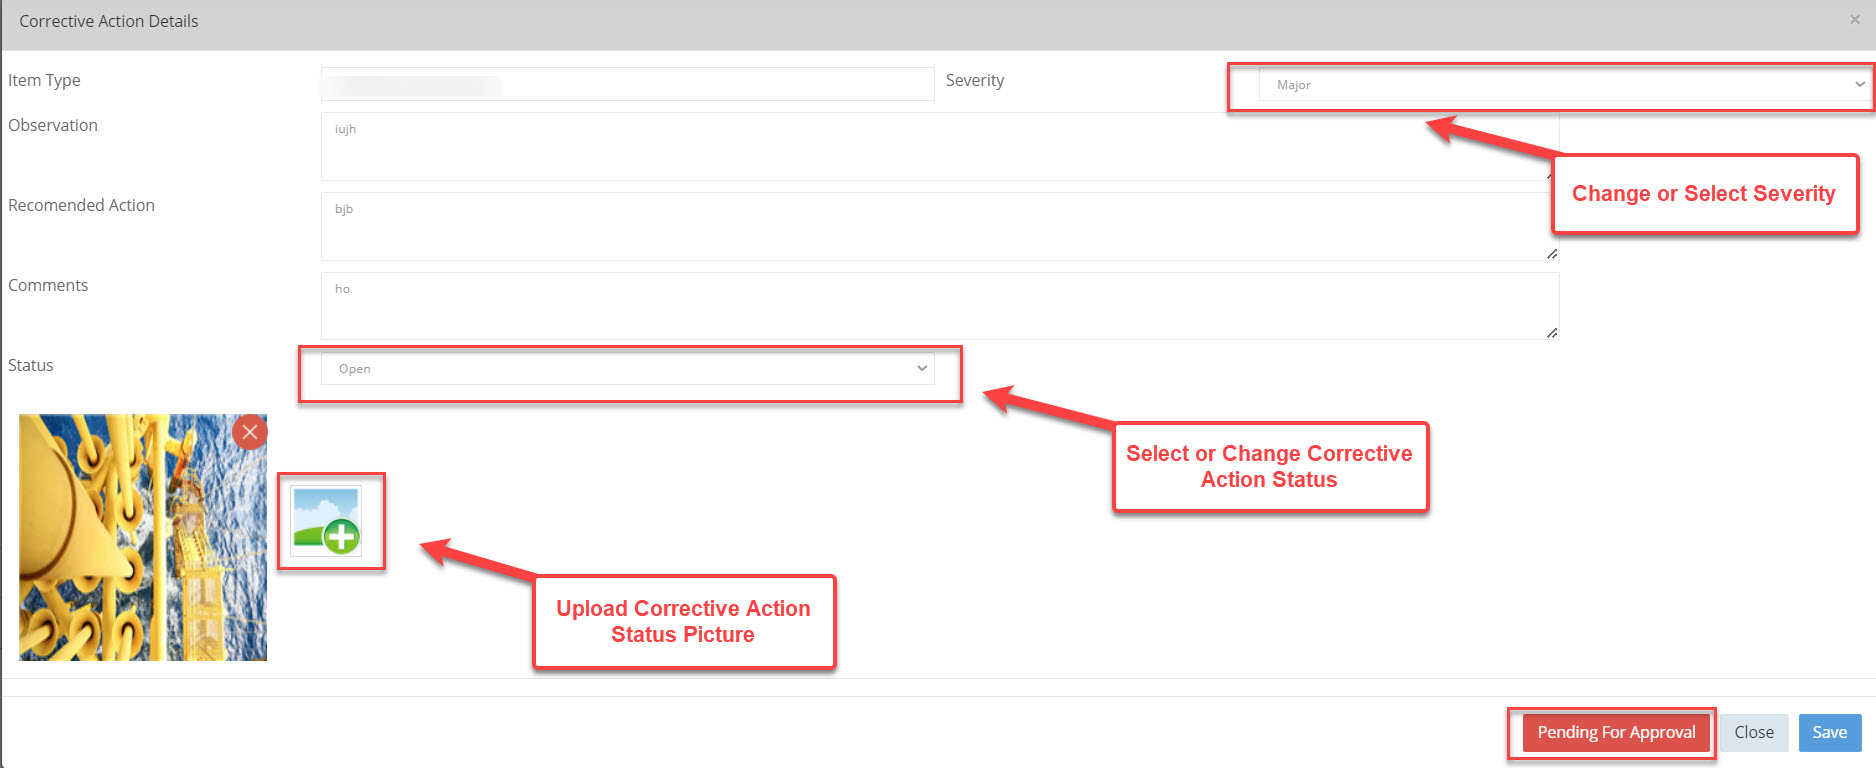
11 Corrective Actions: Here is the detailed page while eidting corrective action details. The user has to fill in or update related info as following:
- Select Corrective Action Severity ("Major", "Medium Minor", "High Minor", and "OFI")
- Select Corrective Action Status
- Upload or Update Picture
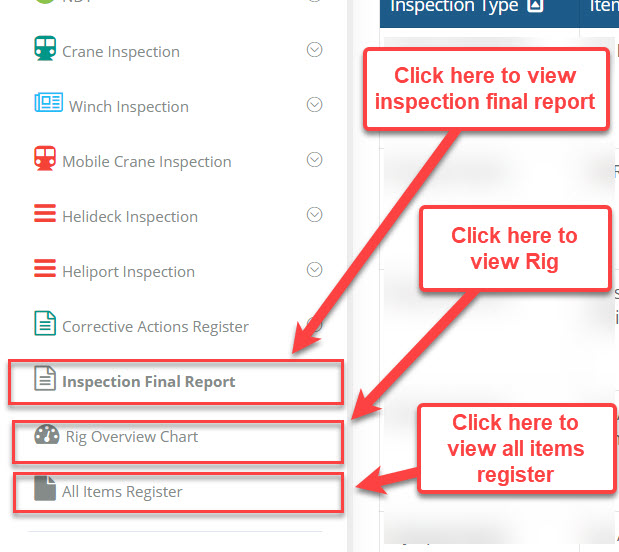
12 The User can navigate to different sections and view Final report by navigating to side menu as mentioned in attached picture.
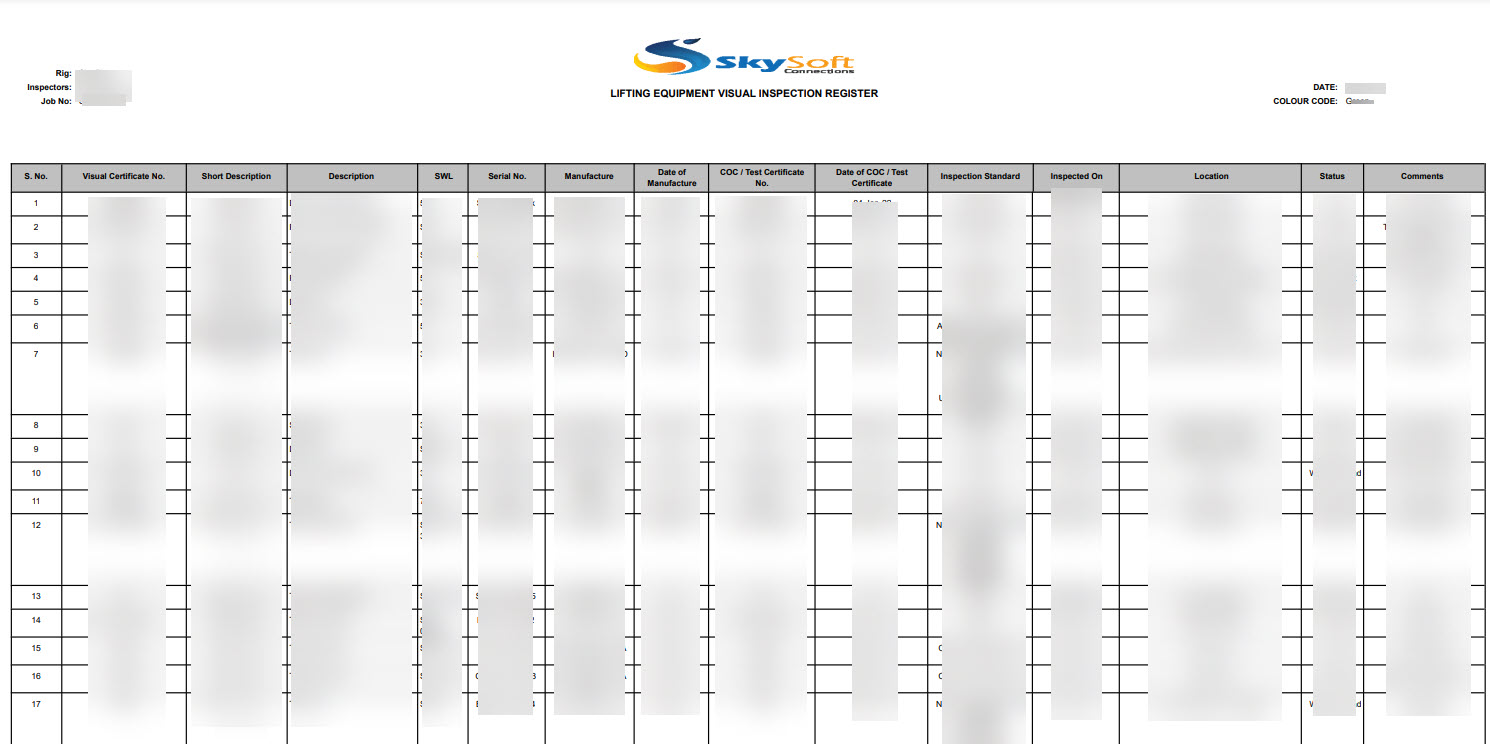
13 All Items Register Report: The sample report of all items register when the user clicks on "View Registers" button.
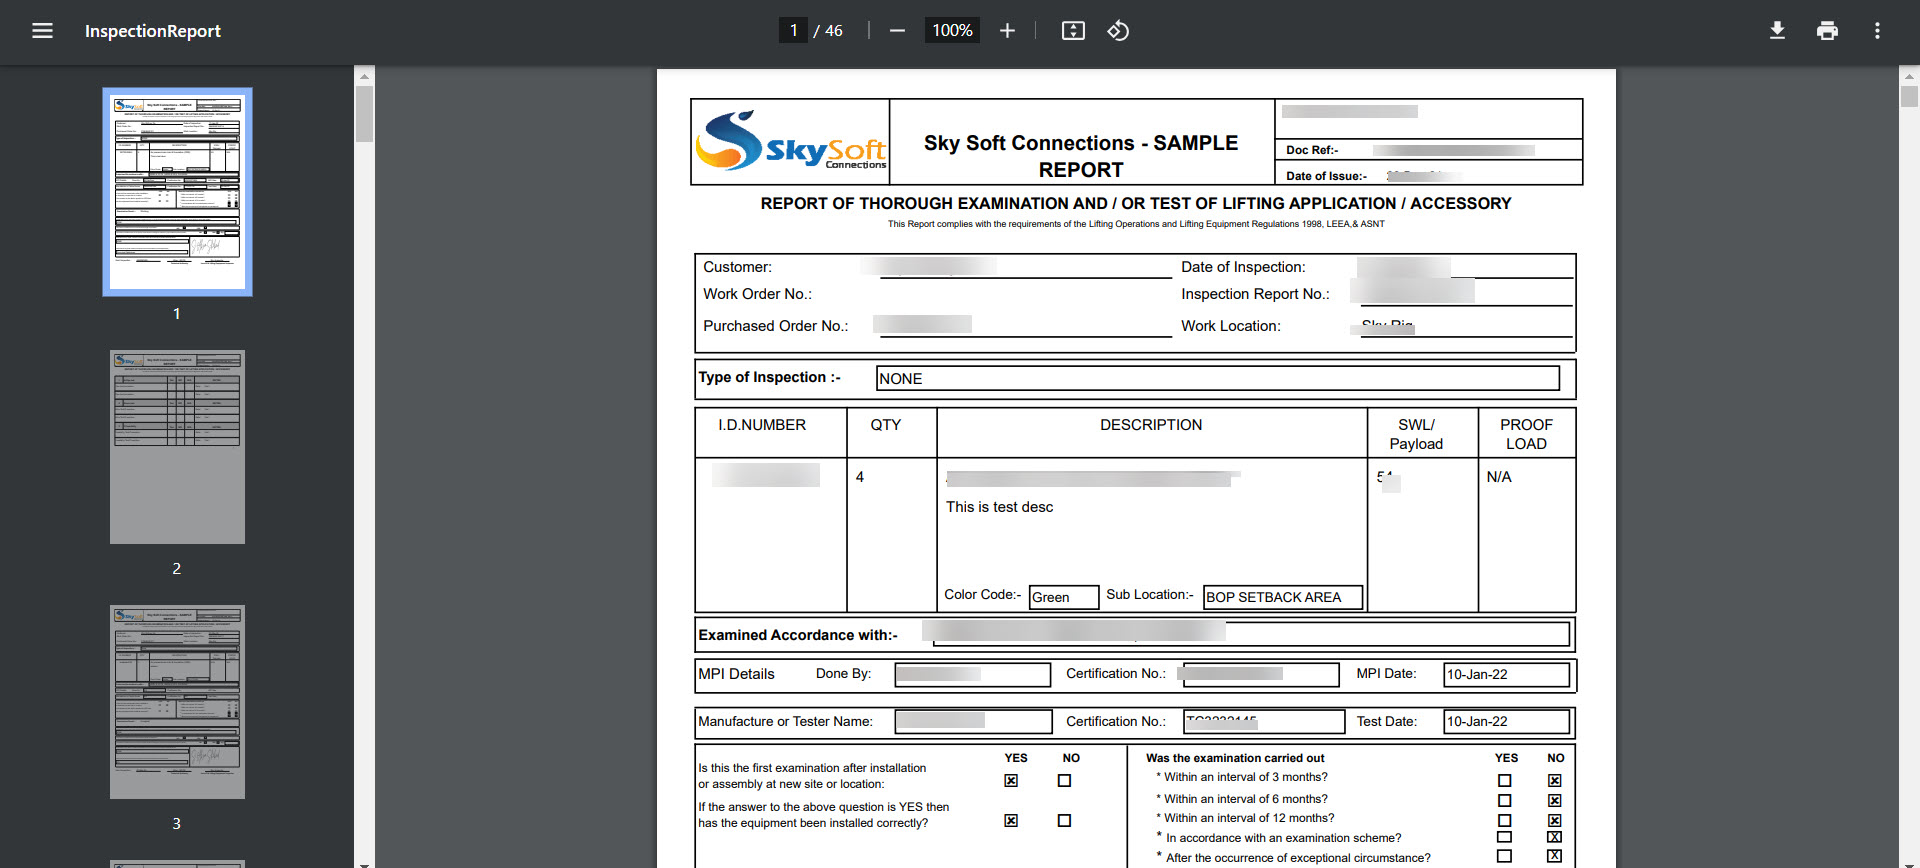
14 LEEA Report: The sample report of LEEA Report when the user clicks on "LEEA Reports" button.
15 Single Item Report: The sample report of an individual item in the list when the user clicks on "View Report" icon.
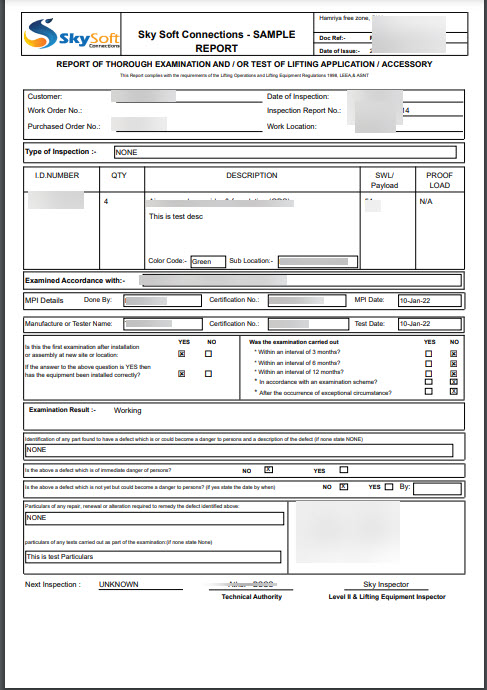
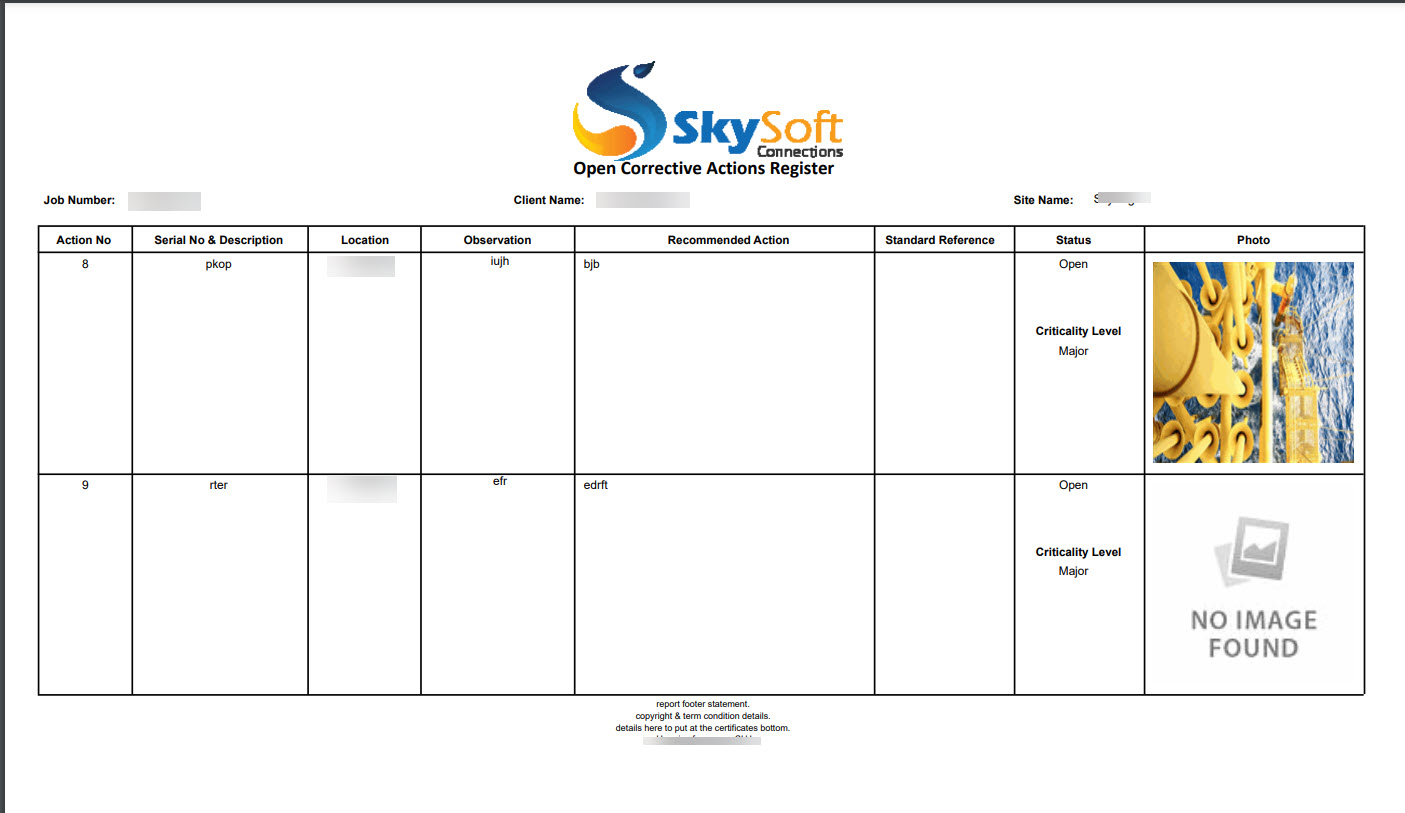
16 Corrective Action Report: The sample report of corrective actions when the user clicks on "View Report" button.
